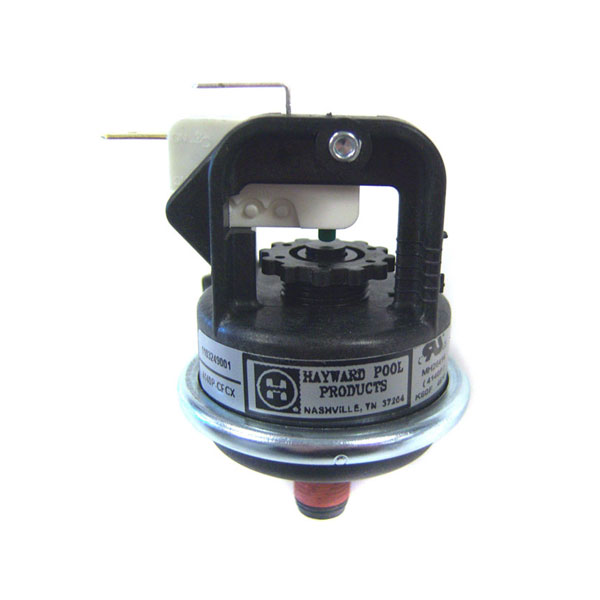
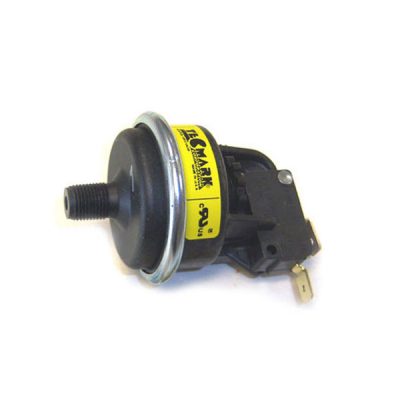
Original Authentic Hayward H-Series Swimming Pool and Spa Gas FD Heater Pressure Switch FDXLWPS1930
- Please Note: FDXLWPS1931 is compatible with all residential units January 2021 and Forward.Ex. 21122101xxxxxxxx
- Please Note: FDXLWPS1930 is compatible with all residential / commercial ASME units December 2020 and Prior.Ex. 21122012xxxxxxxx
Genuine Hayward H-Series Replacement Water Pressure Switch.Compatible with ALL Hayward Forced Draft Heaters:H150FDN, H150FDP, H200FDN, H200FDP, H250FDN, H250FDP, H300FDN, H300FDP, H350FDN, H350FDP, H400FDN, and H400FDP.Compatible with ALL Hayward ASME Forced Draft Heaters:H250FDNASME, H250FDPASME, H400FDNASME, and H400FDPASME.Compatible with ALL Hayward H-Series A/G H135 Heaters:H135ID1, and H135IDP1.Water Pressure Switch Replacement Procedure. FDXLWPS1930 for Universal H-Series (Forced-Draft) HeatersIMPORTANT NOTES:This kit is intended to be used only with Hayward Universal H-Series (forced-draft) gas heater models. These heaters may beidentified by inspection of the heater rating plate (there should be an ‘FD’ in the model number), or by visual inspection of theheater in comparison to the diagrams in these instructions.REPLACEMENT PROCEDURE
- Turn pump, main gas valve, and heater power off.
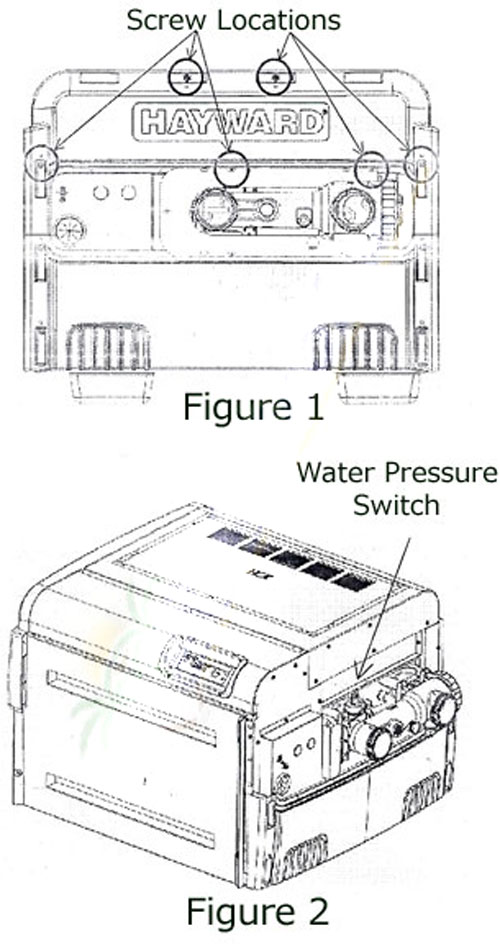
- Remove 6 screws and remove the upper plastic heater side panel, to allow access to the header (see Figure 1 for screw locations).
- Disconnect wires from pressure switch.
- Remove pressure switch by un-threading it from the header (see Figure 2 for pressure switch location).
- Install new pressure switch in header. Apply pipe thread sealant to pressure switch threads before assembly. Use care to not cross-thread the pressure switch when threading into the header.
- Connect wires to new pressure switch.
- Test operation of the pressure switch and adjust if necessary (see below).
- Re-install upper plastic heater side panel.
TEST / ADJUSTMENT PROCEDUREThe pressure switch is preset at the factory for most typical, deck level installations. When the heater is located above or below the level of the pool or spa, the pressure switch may require adjustment to compensate for the change in static head pressure. The following procedure is recommended when the switch needs adjustment and/or is replaced:For Installations with Heater Above Water Level:
- Be sure the filter is clean before making the adjustment.
- Turn ‘ON’ the tilter pump and ensure all air is out of the water lines, and ensure water flow rate is 30 GPM minimum.
- Turn ‘ON’ the heater and adjust the thermostat to create a call for heat.
- lf the heater does not light, adjust the pressure switch by turning the adjustment knob on the pressure switch counter-clockwise, until the heater lights. Turning the adjustment knob counter-clockwise decreases the pressure needed to close the switch. Check the function of the pressure switch by turning the filter pump on and off several times. The pool heater should turn off immediately when the pump is turned off. Never allow the heater to operate with less than a 30 GPM water flowrate.
For Installations with Heater Below Water Level:
- Be sure the filter is clean before making the adjustment.
- Tum ‘0N’the filter pump and ensure all air is out of the water lines, and ensure the water flow rate is 30 GPM minimum.
- Tum ‘ON’ the heater and adjust the thermostat to create a call for heat F
- Turn the adjustment knob on the pressure switch clockwise, until the heater turns off, then turn the knob 1/4 turn counter-clockwise, so that the heater turns back on. Turning the adjustment knob clockwise increases the pressure needed to close the switch.
- Check the function of the pressure switch by turning the heater pump on and off several times. The pool heater should turn off immediately check the pump is turned off. Never allow the heater to operate with less than a 30 GPM water flow rate.


Reviews
There are no reviews yet.